Dear visitor, welcome to Legend: Legacy of the Dragons Forum. If this is your first visit here, please read the Help. It explains in detail how this page works. To use all features of this page, you should consider registering. Please use the registration form, to register here or read more information about the registration process. If you are already registered, please login here.

- 1
- 2

 CrackerJack [2]
[GUIDE] Labyrinth Bosses

 CrackerJacks present a guide to fighting Labyrinth bosses.
We would like to remind you that there are many ways to fight the bosses. We present just some of them and invite you to share your own strategies in this thread!
This post has been edited 1 times, last edit by "rubecula" (Aug 31st 2022, 9:33pm)
Vision of Poseidopus
Uses Preparing the Bloodsucker Strike, it lasts for one turn and after that he uses Bloodsucker Strike, which - unless you are in block - causes you to lose 60% of your health and Poisedopus to heal 20% of his life. So as soon as you see Preparing the Bloodsucker Strike, turn block on.
Similarly, he uses Preparing the Sweeping Blow for one turn, then you need to make sure you are not in block, otherwise he will use Sweeping Blow, which will cause you to lose 40% of your hp and over the next 600 seconds you will be losing health and mana in the amount of 80% of the damage dealt.
Every 7 minutes he uses A touch of chaos. If you have not used an improviser, then the blow will be lethal.
Recommendations:
Spirit, atshi, 1 slot improvisers, 3 slots mana, 1-2 life pots, optionally punch
Use an improviser on yourself at the beginning of the battle. During the fight pay close attention to Poisedopus's effects and as soon as you see him preparing a blow turn block on (Bloodsucker Strike) or off (Sweeping Blow).
This post has been edited 1 times, last edit by "rubecula" (Aug 31st 2022, 9:33pm)
Tskar, Lord of the Elements
From the beginning of the fight Tskar has the Favor of All Elements effect. An improviser will remove the Favor of All Elements, leaving Favor of only one of them: water, earth, fire or air. If you use an improviser on one of the single element favor effects, it will be changed to a random favor (if the random one ends up being the same as the previous one, the timer will not update).
40 seconds before the end of the favor effect, new effects will be applied (depending on the element):
Favor of Fire: Burn and Hellfire
Favor of Water: Soaking and Underground Stream
Favor of Earth: Dirt and Trembling Earth
Favor of Air: Lightning strike and Thunderstorm
The Great Joining of the Elements works outside of Tskar's turn. When you receive it, the missing elemental favor effects, with a delay of 1-2 seconds, will be applied for 90 seconds. The Joining of the elements has a 90 sec timer.
Recommendations:
Spirit, atshi, 1-3 improviser slots, 3 slots of mana
Remove the Favor of all elements immediately after the start of the fight. Use an improviser if you get the air element. Use an improviser when the timer on a Favor effect is ~50 seconds.
This post has been edited 2 times, last edit by "rubecula" (Aug 31st 2022, 9:34pm)
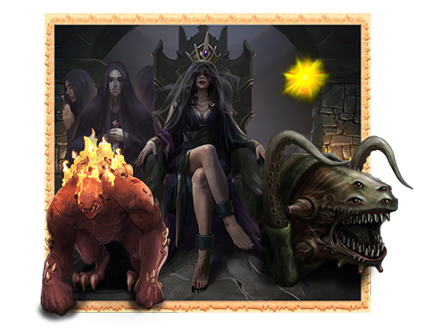
Custodian of Life
At the beginning of the fight, the Custodian has 30% of hp. When he is healed fully, you will win the fight (you will also win if he dies).
There will be 4 Dark Priests [1] at the beginning of the fight, each of them using Absorption Aura on the Custodian.
Every 5 minutes, during his turn, the Custodian will summon 4 random creatures:
Bone Warrior [1] with Whirlwind of Bones skill,
Dark Mage [1] who uses Weakness Aura and Arrow of Darkness effects,
Bloated Corpse [1] with Explosive Disposition skill (lasts 180 seconds, when the effect expires, the Bloated Corpse dies automatically)
When you kill any of the summoned creatures (Bone Warrior, Dark Mage, Bloated Corpse), then the Custodian will be healed by 7%.
Improvisers prevent the Custodian from receiving any damage. The improvisers can sometimes activate with a few seconds delay. While the barrier is active, you can use another improviser, it will automatically activate when the effect of the previous one expires (there is however no point in using more than 1 improviser while another is active).
If your health drops below 10%, the Custodian will sacrifice 10% of his maximum hp to restore 40% of your health (he does not lose his hp if an improviser was used).
Recommendations:
Spirit, punch, anger (or wisdom), 5-6 slots of improvisers, 1-2 slots of mana
Make sure the Custodian is under the effect of an improviser at all times, he can then heal you anytime your life is low without losing his hp. Make sure to monitor your hp before the Bloated Corpse's Explosive Disposition. Kill the Dark Priests as soon as possible.
Alternatively, you can kill the Custodian (drop him to 0% hp and win the fight) if you kill the priests first and then him within 5 minutes.
This post has been edited 2 times, last edit by "rubecula" (Aug 31st 2022, 9:34pm)
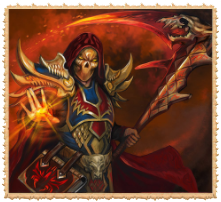
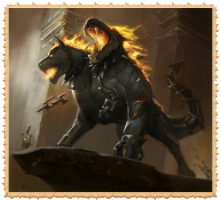
Ghostly Commander Ulf

The fight begins with the Ordeal by Fire effect. It lasts for 200 seconds, and after that it changes to Ordeal by Darkness (which also lasts for 200 seconds).
The Commander uses the Alone in the Dark effect every 3 minutes from the start of the fight. At this point you can use a summon (a pkhadd or a tiger) so that you don't get +3 Fear
Every 5 minutes the Commander will use a Living Bomb. The effect lasts for 200 seconds. If at the end of it there were no summons with this effect, the damage is not perceptible.
Every 6 min 45 sec from the beginning of the fight, the Ghostly Commander uses The Horror of the Inevitable. The effect lasts 1 turn. If you do not use an improviser to activate the protection (35359), on the next turn it will take away 90% of your life (damage you inflict by will be reduced by 90% for 10 turns regardless of whether you use an improviser or not). You can use the improviser in advance to make sure you don't miss the effect.
Recommendations:
Spirit, atshi, 1 slot of improvisers, 3-4 slots of mana (preferably scrolls), 1-2 life pots, 1-2 slots of healing scrolls, 3-4 pkhadd/tiger wraiths
Keep an eye on the effects, use a summon before Alone in the Dark, be prepared for the Horror of the Inevitable. During the Ordeal by Darkness, use mana and heal scrolls to help counter the retribution effect.
This post has been edited 2 times, last edit by "rubecula" (Aug 31st 2022, 9:35pm)
Royal Huntsman Elgar

Faithful Entourage - the fight starts with Snaggletooth [1], Limpalong [1] and 3 Hunting Dogs [1]
The hunting dogs use Stealth every turn (lasts for 40 seconds, stacks).
Every turn Elgar summons a new Hunting dog, until all of them are killed.
After 5 mins he uses Take Aim. The effect lasts 20 second. It's best to stay in block then. If Limpalong is alive, there is a high probability of getting stunned, and Snaggletooth's attack power significantly increases. Elgar uses Take Aim every 10 minutes.
Occasionally, Elgar uses Trap, the effect lasts a minute. The trap can be activated at any point, so it's recommended to turn the block on.
Approx. every 3 minutes, Elgar sends a Flock of Ravens. The effect lasts for about 100 seconds.
Periodically Snaggletooth and Limpalong inflict damage equal to 10% of your hp.
Improvisers stun Snaggletooth and Limpalong for 20 seconds. They can be used to quickly get rid of the dogs. After using the improviser, you should wait until the effect is applied (otherwise you might end up fighting a different enemy when the stun is applied). Stuns in a row do not work, at least one turn must pass between them.
Recommendations:
Spirit, atshi, punch, 1-2 slots of improvisers, 5 slots of mana
Kill the hunting dogs at the beginning of the fight so that they do not interfere. As soon as Limpalong is opposite to you, use an improviser - best to kill it as soon as possible, so that Take Aim is not so dangerous. The remaining improvisers can be used on Snuggletooth. Keep an eye on the effects, stay in block when he's taking aim or throwing a trap.
This post has been edited 1 times, last edit by "rubecula" (Aug 31st 2022, 9:35pm)
Black Dragon Oruzd
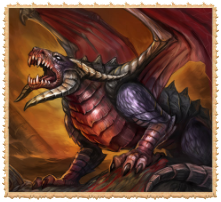
The fight starts with 4 spirits on the Dragon's side: Spirit of Destruction [1], Spirit of Creation [1], Spirit of Rage [1], and Spirit of Absorption [1]. The spirits are invulnerable to any damage, but they don't attack either. The spirits die if you use a scroll of poisoning on them. When that happens, the spirits will give you a blessing:
Spirit of Destruction - Blessing of Destruction
Spirit of Creation - Blessing of Creation
Spirit of Rage - Fury Blessing
Spirit of Absorption - Blessing of Absorption.
If you already have one of the spirits' blessings, you will not get a new one after killing another spirit.
Every 5 minutes, Oruzd uses Dark Flame. It is important to have any of the spirit blessings then.
Mighty Swing - the initial cooldown for that skill is 3 min 30 sec. With every use that time is reduced by 10-15 seconds.
An improviser used on yourself will allow you to resurrect the spirits (you lose the spirit blessing), recover 20% of your maximum life and add 60 seconds to the Mighty Swing's cooldown. Improvisers can be used only once every 10 minutes.
Triumphant Roar - the dragon won't use it if it doesn't kill anything in battle, so it's best not to use summons.
Recommendations:
Spirit, atshi, punch (optional), 1 slot of improvisers, 2-4 slots of poisoning scrolls, 3 slots of mana
Immediately after the start of the fight poison the Spirit of Creation. Use physical hits on Spirits to save mana, fight the Dragon with magic. As soon as the cooldown of the scroll of poisoning has passed, kill the Spirit of Fury, this way you will not receive the retribution effect. After the Dark Flame, kill the Spirit of Absorption. After another Dark Flame - Spirit of Destruction.
Now only the Dragon remains, hit as hard as possible. The Dragon will then use another Dark Flame and remove the last of the spirits' blessing. You now have 5 minutes until the next Dark Flame. If possible, kill the Dragon in this time - if not, use the improviser on yourself to resurrect the spirits and start killing them in the same sequence as before. It's best to do it in the last minute, so that you can continue fighting the Dragon alone for as long as possible.
This post has been edited 1 times, last edit by "rubecula" (Aug 31st 2022, 9:35pm)
Monster of the Cathedral
Uses Furious Charge when noise level reaches 100. The Furious Charge puts out the Torch, which causes the Bright Light to disappear in battle (the effect will return after the fight) and you receive Gloom (your damage will be reduced by 60% until the end of fight).
Uses Blind Fury approx. every 2 minutes from the start of the fight. The noise levels do not go up during this effect, so you can hit harder.
When the level of noise is below 50, the monster does not attack. When the noise reaches 50, the monster uses Blindness and attacks, taking away 10% of your life every turn.
Occasionally the monster uses Darkness (+10 to noise level is your torch is lit)
Improvisers reset the noise level, but they should not be used more than 5 times. The noise level drops only for the player.
Recommendations:
Spirit, atshi, 1 slot of improvisers, 1-3 gargoyle wraiths, 8 packs of different lings
Simply hit hard until it dies, resetting noise when it reaches 95.
Alternatively, when the fight starts, use Gargoyle wraiths. The more neck blows, the shorter the fight will be. Once the Gargoyles are dead, use all the ling packs, and another wave of lings when it's possible. Use magic poisoning throughout the entire fight. Use the improvisers at 95 noise level, but no more than 5 times.
This post has been edited 1 times, last edit by "rubecula" (Aug 31st 2022, 9:36pm)
Three Sisters
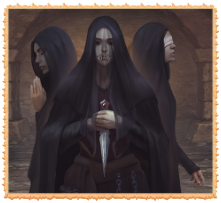
If you kill one of the sisters, the others will die as well.
Approx. every 20 mins (no exact data, possibly random), a Darkness Ritual is performed by one of the sisters, the other two prepare to join it. The preparation effect can be removed with improvisers.
When one of the sisters has less than 10% of hp left, another sister will accept her confession. The effect lasts 3 minutes. The sister who accepts the confession receives double damage and if she loses 20% or more of her maximum health, the sacrament is interrupted.
Sister Helda uses Vow of Silence, which prevents you from using magic (does not affect glaze).
Sister Cora periodically uses Vow of Blindness on herself, which blocks all damage for 1 turn.
Sister Ilse uses Vow of Humility which prevents you from dodging, blocking or inflicting critical blows.
Recommendations:
Giant, spirit, atshi, punch, 3-4 slots of mana, 1 slot of improvisers, 1 slot of powers/bloods.
Use Great thirst for blood when you're silenced. During confession you can use two summons to lock yourself against either the dying sister or the one who is receiving the confession and use powers/bloods.
The fight is easier for glaze users, it is advisable to take more mana if you don't have the Great Thirst for Revenge combo.
This post has been edited 1 times, last edit by "rubecula" (Aug 31st 2022, 9:37pm)
Resurrected Shaissar
Shaissar uses Contaminating Breath three times during the fight: first use when its hp is between 100% and 40%, second time between 40% and 20%, and the third time when its hp drops below 20%. The silencing only works for magic and does not affect glaze.
Hooks of Death - applied 10 times, as soon as you notice this effect turn block on.
Feather Blades, after the first time it appears (random), Shaissar uses it every 3 minutes. Best to stall and skip turns during this effect.
Every 20% of its hp, Shaissar uses Devastating Song. You should then take away 5% of its life as soon as possible.
Takes a Deep Breath every 80 seconds. With 3 of those effects, it uses Shrill Scream. Make sure to go in block then or use an improviser. An improviser only neutralizes 1 deep breath effect. Useful especially when Shaissar applies many effects at the same time.
Recommendations:
Spirit, atshi, punch, 1 mana slot, 1 improvisers slot (optional), life pots.
For players lvl 11-15 it is recommended to bless well, including as much vampirism effect as possible - amulets/rings, elixir of destruction, deck, talents. Use Great Thirst for Blood combo. Consider using Arhas, Grog, Shadow with Healing/Resurrection. Aladeya or Dragon deck and banner.
For glaze users the fight is not that difficult, just need to keep an eye on the effect and act accordingly. If you don't have the Great Thirst for Revenge combo yet, you might need more mana in your belt.
This post has been edited 1 times, last edit by "rubecula" (Aug 31st 2022, 9:37pm)
Guardian of the Labyrinth
Each of the Guardian's heads attacks its own target for 3% of the maximum health. If there is only 1 target, then both heads will deal damage to it.
Breath of the Elements - every 80 seconds the Guardian applies a random elemental effect on each enemy. In the last 12-15 seconds of the elemental effect it's better to stall a bit to avoid Joining of the elements.
The Guardian's head will deal damage equal to 10% of the opponents 10% life if the opponent has no elemental effects.
An improviser used on the Guardian causes all elemental effects on all fight participants to disappear and new, random ones, are applied. If the new effect is the same as the previous one, the timer will not reset.
Every 3 min 20 sec from the beginning of the fight, the Guardian uses Accumulation of forces, which lasts 30 seconds. The Call of the Elements temporarily enhances all elemental effects on the target; if there were no elemental effects on the target, a new one - already enhanced - is applied.
Recommendations:
Spirit, atshi, 1-2 slots of improvisers, 1-2 heals, rest - mana.
You can use lings at the beginning of the fight and use an improviser on the Guardian, so that the lings receive an elemental effect. The damage dealt by the Guardian is a percent of the maximum life, so lings will survive for quite a long time.
Use an improviser on the Guardian if you have the Lightning strike to change it to a different effect.
This post has been edited 1 times, last edit by "rubecula" (Aug 31st 2022, 9:37pm)
Spirit of the Kratkh

Every defeated creature (on your side) will heal the Shaman for 20%, so it's best not to summon anything.
Atshi elixir's effect will be removed immediately.
2 minutes after the start of the battle, within 2 minutes, the Shaman calls 4 Pack Kretches [1]. The summoning is repeated every 10 minutes.
The kretches hit harder every turn, depending on the number of kretches in the fight.
Shamanic Swing is used every 12 minutes from the start of the fight. The effect lasts 200 seconds, after which Kratkh uses Shamanic blow. Damage is applied instantly, 5% for each of your effects.
If you kill a Pack Kretch, then the Shaman will use Corpse Explosion. If that happens, it's best to stall while you have the retribution effect.
Recommendations:
Wisdom (or anger), spirit, punch, 4-5 slots of mana, no improvisers
Take as much of Kratkh's life as possible before the pack kretches are first called in battle. Try not to kill the kretches before you kill the Shaman. Use your magic poison spell on Krakth. Make sure your hp is high before the Shamanic Blow. As soon as the Shaman dies, you can kill all the other kretches safely.
This post has been edited 1 times, last edit by "rubecula" (Aug 31st 2022, 9:38pm)
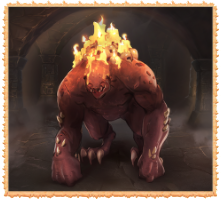
Labyrinth Golem
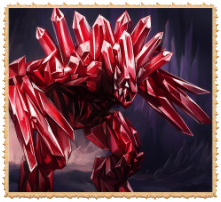
Crystalline Hold - you need to keep your hp at 40% or lower, otherwise you won't be able to inflict any damage to the golem (when your hp gets below 40%, there might be a slight delay before this effect is removed). An improviser used on yourself can help you get your life down to 40% faster.
Stone Fists - keep your hp higher than 10%, otherwise the golem will hit 1.5 times stronger than normally.
Crystal Fragility - if your hp is lower than 10%, then the damage you make will also be increased by 1.5 times.
Sharp Edges - when Golem's hp drops below 30%, you will start losing mana and health (in the amount of 40% of the damage dealt).
Healing Mineral - every 8 min 30 sec. The healing is instant, but it can be blocked in advance by the use of an improviser.
Recommendations:
Giant, spirit, atshi, punch, 0-1 improviser slots, 2-3 mana scrolls slots, 1-2 healing scrolls slots. Any blessings that increase your life level will be useful (to increase the hp range in which you can safely attack the golem).
Keep your health below 40%, use great thirst for blood/revenge. If your hp drops very low, switch to magic, restoring your hp up to 40%. When Golem's life drops below 30% and you receive the permanent retribution effect, use the scrolls to prevent losing too much health and mana.
This post has been edited 1 times, last edit by "rubecula" (Aug 31st 2022, 9:38pm)
The Maw
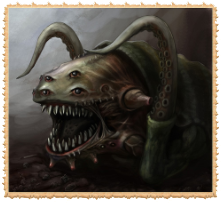
Gastric Juice works for the whole fight.
Uses Symbiosis every 3 minutes from the start of the fight, the effect lasts 2 minutes, after which it summons the Parasite [1] to the player's side. Parasite does not take damage from the Maw at all. After ~100secs, the Maw eats the parasite (provided that there are no summons in fight with less than 10% of their hp), it then restores hp and gets stronger (Free Meals)
Recommendations:
Atshi, improvisers, 3 slots of mana (optionally punch)
As soon as a Parasite appears, kill it with an improviser. Do not summon anything (it's not needed anyway), a rather easy fight.
This post has been edited 1 times, last edit by "rubecula" (Aug 31st 2022, 9:38pm)
Heart of Nightmare

Uses Pulse of Terror every turn instead of the regular blow
At the beginning of the fight casts Invulnerable Void on itself, it gets removed with 5 Blood saturation effects. The heart of nightmare gets one of those effects every time you kill a Bloodclot [1]. Blood clots are summoned every time when a summon dies on your side (Bloodletting) or when you use an improviser on yourself.
Approx. 3-5 mins after the loss of protection, the Invulnerable Void will be re-applied (the blood saturation effects do not get removed at this point, if there was 5 or more of them, the invulnerable void disappears immediately).
When you lose 20% of your health, Heart of Nightmare will sometimes use Bloody Path on a random Blood Clot. The effect lasts 3 minutes and during this time you need to kill the blood clot.
Recommendations:
Spirit, atshi, mana, 4 ling summon amulets (different colours), zigred amulets.
As soon as the fight starts, use a pack of lings, kill the clots. When the Invulnerable Void refreshes, throw another pack of lings. When the heart has 4 blood saturation effects, it's better to use a zigred rather than lings. Repeat until the end of the battle.
This post has been edited 1 times, last edit by "rubecula" (Aug 31st 2022, 9:39pm)
Animated Armor
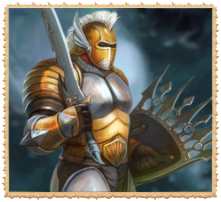
The Animated Armor uses different combos:
Shieldwrecker:


Before the last hit of the combo make sure you are not in block
Touché!:
Before the last hit of the combo, turn block on
Coup de Grâce:
Before the last blow use an improviser on Animated Armour to interrupt the combo
Each time Animated Armor takes (approximately) 20% damage to health, he uses the ability Protective Stance, which lasts for 4 minutes.
Recommendations:
Spirit, atshi, punch, 2-3 slots of improvisers, 3-4 mana slots
Best to write down the combos before the fight and keep track of them in the fight log. When Protective Stance is active, stay on block and skip turns. Coup de Grace does not have to be interrupted every time, if healing from atshi/heavens allows, but better to interrupt it if it happens just before or during Protective Stance.
This post has been edited 2 times, last edit by "rubecula" (Aug 31st 2022, 9:39pm)
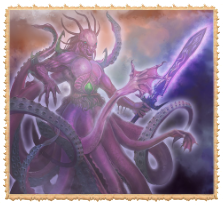
Chaos Mage

Every turn the Mage uses Possession on the opposite target opposite to him. Every turn, he will inflict damage to the possessed enemy equal to 5% of the regular damage.
Uses Fireball Volley approx. every 5 minutes from the start of the fight. The effects of Burn stack.
When the Mage loses 30% of his life, he summons the Spirit of Chaos [1] and the Spirit of Annihilation [1]. The Spirits do not attack.
The Spirit of Chaos enables the Mage to use the Chaos arrow Volley, the Spirit of Annihilation - the effect of Destruction. Both of those skills are used randomly during the fight. If you use an improviser on one of the spirits, the corresponding skill gets blocked for 5 minutes.
When both spirits are dead, the Mage uses Chaos Aura. Its effects will last until the end of the fight. It is advisable to take 10% of the Mage's life as soon as possible.
Recommendations:
Spirit, atshi, punch, 1 slot of improvisers, 4-5 mana slots, rest - lifes.
When the Spirits appear, keep the Spirit of Chaos under the improviser effect until it dies (an improviser will work only if the effect of the previous one has ended). When Spirit of Chaos Dies, you can either kill the Mage first and then the Spirit of Destruction, or the other way around - but then you will need to watch out for the Chaos Aura.
This post has been edited 1 times, last edit by "rubecula" (Aug 31st 2022, 9:40pm)
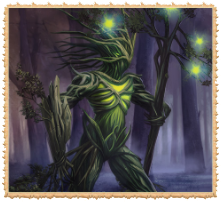
Forsaken
Sickness aura - applied with each Forsaken's blow, lasts 40 seconds
Cursed Earth applied exactly every 2 minutes from the beginning of the fight, throw at least 2-3 wraiths (or a pack of lings) right before that
Fight divided into 3 stages:
- first 30% of hp - Scorching Aura - every minute during his turn, Forsaken takes life from all enemies. the longer the fight, the more effects he puts at the same time
- second 30% of Forsaken's hp - Baneful Aura - every minute
At this point he throws 1-2 Jinxes, best to use improviser and transfer it to a wraith or mount as soon as possible (but not to a wraith that is about to die, since it takes time to transfer the Jinx and it might lead to the improviser being wasted). You can't use the improviser if Forsaken is fighting you at the moment.
- last 40% of Forsaken's life - Aura of Madness - again, every minute since entering this stage, during Forsaken's turn. (There may be a bug causing retribution to not work.)
Recommendations:
Spirit, atshi, 1 slot improvisers, 3 slots mana, rest - life pots; blesses will be helpful. Ling amulets (different colours) and/or other wraiths, enough to summon every 2 minutes
Set a timer to every 2 mins or start the fight 10 secs after a new minute and throw wraiths at the beginning of every second minute.
This post has been edited 1 times, last edit by "rubecula" (Aug 31st 2022, 9:40pm)
Underground Scorpion
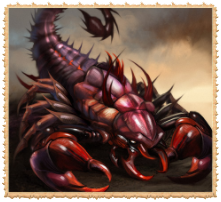
The Chitin Armor can be removed by using any strength loss arrow, any scroll of poisoning, summoning anything into battle or using an improviser.
To avoid Chitin Explosion and Weak Spot (lasts 200 seconds), after which the Chitin Armour will be restored and Scorpion will get stronger, it's best to remove only 3 Chitin Armour effects.
Every 5 minutes from the start of the fight, the Scorpion uses Volatile Scorpion Poison. If at this point you have any healing scrolls or potions effects on you, then the Life Extracting Poison will be additionally applied. If you have any effects of elixirs/extracts of power/blood/vampire, then you will receive the Crippling Poison. If you have used an elixir of giant, you will receive Deadly Poison.
The Scorpion uses Steel Grip every 3 minutes from the start of the fight. If it is used on a summon, then the summon loses 20% of its life every 5 seconds.
Recommendations:
Spirit, atshi, 4-5 mana slots, something to remove 3 chitin armour plates (scrolls of poisoning, arrows (strength loss), zigred wraiths or improvisers)
Do not use a giant. Remove 3 out of 4 plates. Keep an eye on the time of the fight and make sure not to use heals/bloods/vamps/powers when the Scorpion is about to use his poison. Any summons can die easily if Steel Grip is used on them, so there is no point summoning anything (and no need for that either).
This post has been edited 1 times, last edit by "rubecula" (Aug 31st 2022, 9:41pm)
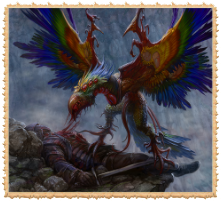
Twin Dragons
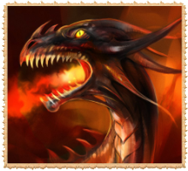
To the Skies - The Dark Dragon does not receive any damage while the Light one is alive (except for when you get the Joining of the elements when opposite to it).
Dark dragon occasionally casts Burning Breath.
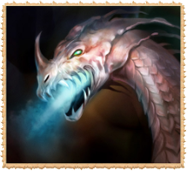
100 seconds after the fight’s start, the light dragon uses Painful Bite, then uses it again every 150 seconds. 120 seconds after the start of the fight the Light Dragon uses Thunderous Breath (and continues using it in intervals of 200 seconds). Every 5 minutes from the start of the fight it uses Trample!, at those moments it's best to be in block.
When Light dragons's hp drops down to 25%, he uses Striking Lightning.
After the Light Dragon is killed:
Dark dragon summons 3 Fire Stars [1]. It uses Sea of Flames, which lasts 10 minutes or until all Fire Stars are dead. The stars themselves do not attack, but each of them has a Combustion effect, which lasts 5 minutes. When the effect ends, the fire star uses Ring of Fire. Before Combustion ends, it's best to use improvisers on 2 out of 3 stars (damage from 1 effect can be safely restored with atshi).
When the Sea of Flames effect ends, the Dark Dragon starts using Dark Frenzy every turn. The effect increases dragon's damage by 1% and it stacks.
Periodically uses Tail Strike.
Recommendations:
Spirit, atshi, punch, 1 slot improvisers, 3-4 mana slots, some zigred amulets
At the beginning of the fight, use zigreds to lock the Light Dragon opposite to you. Since the Dark Dragon does not attack or does damage in percentages, the zigreds will give you some time to kill the light one. When Light Dragon dies, kill the Fire Stars as soon as possible (they do not attack, so you can save mana and hit with Great Thirst of Blood). After Stars' death, kill the Dark dragon as soon as possible, using Force of Anger and magic poisoning.
This post has been edited 1 times, last edit by "rubecula" (Aug 31st 2022, 9:41pm)
- 1
- 2
Similar threads
-
 City Pub »
-
 Labyrinth bosses
(Dec 4th 2021, 12:45am)
Labyrinth bosses
(Dec 4th 2021, 12:45am)
-
- Feedback and Ideas »
-
Cannot enter labyrinth...
(Nov 30th 2021, 6:42pm)
-
- Others »
-
[Guide] Star Custodians
(Jul 15th 2019, 8:41am)
-
- Reputation »
-
Spark of the Heavenly Fires - Guide
(Jul 13th 2016, 2:20pm)
-
- Contact the Game Administration »
-
Compass error
(Dec 2nd 2011, 5:20pm)
